Save Money: 14 Car Repairs You Can Easily Do Yourself
Inspect and Adjust Your Liquids
There are numerous liquids in your car that require regular monitoring and replacement. While you can have these tasks performed at a dealership or with your mechanic, performing these repairs and maintenance activities yourself is quite straightforward. With some practice, you'll quickly master these checks and also pocket the savings.
The standard fluids you should inspect encompass the engine oil—ensure this when the engine is not running and the car is parked on a flat surface. Similarly, brake fluid and power steering fluid ought to be examined with the engine turned off. For checking automatic transmission fluid, start the engine first; it’s best done following about 10 to 15 minutes of driving activity. It's recommended to routinely assess these liquids every week for optimal maintenance.
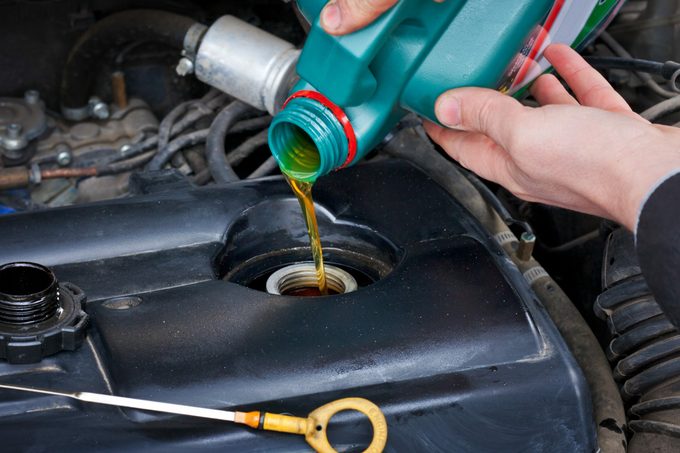
Replace engine oil and filter
This is among the most frequent automobile repair and upkeep procedures. You ought to change the oil And replace the filter according to the schedule set by your vehicle manufacturer. While you might not significantly reduce costs by performing this task yourself, there are valid reasons for taking on this job. Firstly, it ensures that you know exactly what grade of oil is being used in your engine. Secondly, it gives you an opportunity to inspect other components under the car when removing and reinstalling the drain plug.
Change Power Steering Fluid
There are no specific test strips available for checking power steering fluid levels; therefore, follow either your vehicle manufacturer’s recommended schedule or use an approximate guideline of every two years or after driving approximately 24,000 miles. To replace the old fluid, employ the turkey baster technique—remove all the liquid from the system when the engine is turned off. Afterward, fill the reservoir again with new fluid before starting the engine and letting it idle for around 15 seconds. Continue this process of exchanging fluids until you've utilized one entire quart.
Note: Do not use a " universal" power steering fluid as a replacement for the specified type, and avoid adding " miracle" additives or sealant products. These can block the tiny mesh filters within your steering mechanism, leading to costly malfunctions.
Swap Out Brake Fluid
Certain automobile manufacturers suggest changing the brake fluid biannually or after reaching 24,000 miles. Some do not address this topic at all. However, checking your brake fluid can be quite simple; you just insert a test strip into the liquid and match its hue with the reference guide provided on the package.
You cannot perform a full brake fluid flush on your own, but you can opt for a fluid exchange instead. While this method won't remove all of the old fluid, it will introduce sufficient new fluid to improve performance.
Utilize a baster to extract the dark brown brake fluid. Note that brake and power steering fluids should not be mixed, hence employ separate basers for each one. Transfer this collected liquid into a recyclable container. Inject new brake fluid into the reservoir as demonstrated. Afterward, operate the vehicle for approximately a week to blend the fresh fluid with the residual old fluid. Continue repeating these steps multiple times over the coming weeks until the fluid inside the reservoir maintains a pale amber hue.
Note: The brake fluid could harm the rubber bulb of the bleeder, so avoid drawing the fluid completely up into the bulb.
Change Transmission Fluid
Many individuals recognize the necessity of periodically replacing engine oil. However, they frequently overlook the significance of also updating transmission fluid. Certain transmission oil pans come equipped with a drain plug, whereas others necessitate removing the entire pan to extract the old oil. Taking out the pan can be quite troublesome; thus, perform it just one time prior to fitting an adjustable drain plug for simpler subsequent fluid replacements. This identical type of adaptable drain plug could similarly be utilized should the plug in your engine oil pan become damaged due to frequent usage.
Repair Minor Marks
Scrapes, nicks, indentations, and bumps all contribute to making your vehicle appear more aged than it really is. Although professional assistance is necessary for significant harm, minor issues can be addressed by you. repair minor marks yourself .
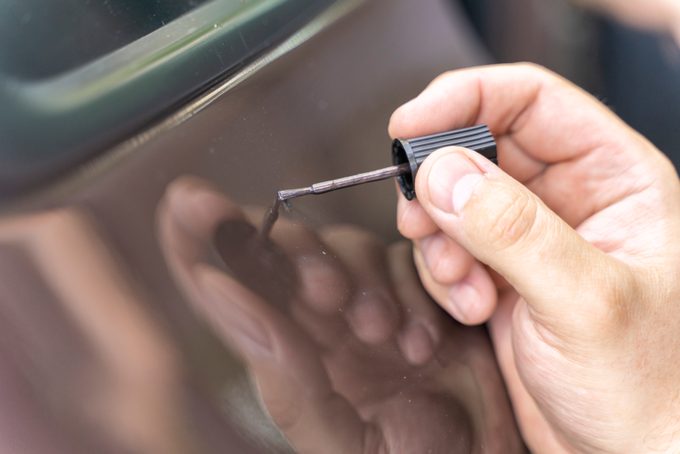
Smooth Away a Paint Scuff
Finish this task flawlessly, and it will seem like magic. If the scratch doesn’t penetrate the paint layer, using an extremely fine grit may help eliminate it. A 6-inch random orbital wood sander could be used here; however, attach a polishing pad rather than an abrasive disk. Apply a gentle automotive rubbing compound along with the dampened polishing pad, and remember to wash everything once completed.
Resolve Minor Dents and Door Dings
If you know how to repair a wall, then repairing a dent in your car should be within reach. For this job, gather different grades of sandpaper, a little tub of auto-body filler, some cream paste, and disposable plastic tools. Begin by using rough-grit sandpaper to smooth out the dent until you expose the underlying metal surface. Afterward, carefully blend the outer edges into the surrounding area. Wipe clean the affected spot with a cleaner designed for removing wax and grime. Following that, combine the body filler according to instructions and spread an ultra-thin layer over the areas marked by the coarser paper’s marks.
Allow the filler to set up and then build up the repair with additional layers no more than 1/4-in. thick per application. Feather the final coat so it levels with the painted areas. After it cures, sand until smooth. Then apply a cream filler to the entire area to fill in any pinholes. Let it cure and do a final sand. Then you can paint the area with touch up paint.
Check Your Wheels
Several automotive repairs related to wheels can be managed personally. Although they might appear daunting initially, taking them step-by-step will allow you to tackle any of these vehicle upkeep and fix jobs effortlessly.
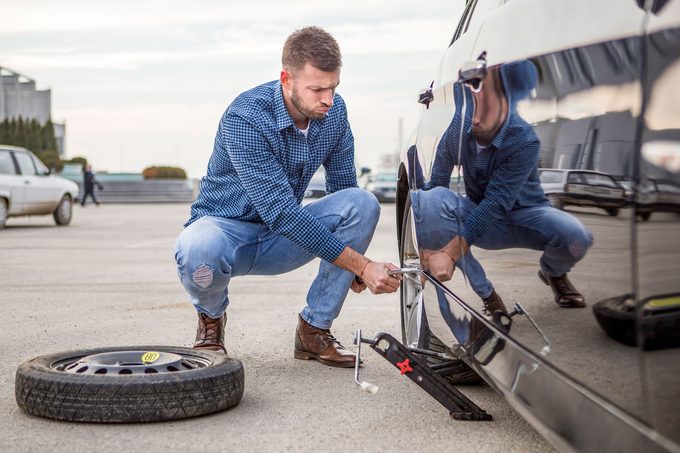
Fix a Flat Tire
Automotive tires went tubeless over 40 years ago, enabling fix a flat tire While it’s still attached to the vehicle, start by finding the source of the leak. Inflate your deflated tire and apply a solution made from 80% water and 20% dish soap; this should cause bubbles at the point where air is escaping. Once identified, use either a piece of chalk or a white paint marker to clearly indicate the location.
Should you encounter a screw, nail, staple, or an open hole in your tire's tread, consider handling this as a do-it-yourself auto care task. First, elevate the vehicle using a jack and secure it further with a safety wedge placed beneath the chassis. Next, remove the offending object like the screw or nail before employing a plug kit for sealing off the puncture site. Don’t forget to apply some adhesive from a tube of tire repair cement included within the kit.
Should an issue arise at the point where the rubber contacts the metal rim due to leakage, this requires professional attention from someone capable of removing the tire from the rim and reinstalling it using a sealing compound.
Re-Torque Your Wheels
Following several incidents in the late 1990s where wheels detached from cars, automotive technicians began recommending that newly installed wheel nuts should be inspected for tightness after traveling approximately 50 miles. You can perform this maintenance using a torque wrench, an instrument designed to measure the rotational force exerted on a nut. While seventy foot-pounds is often specified as the appropriate level of torque for wheel nuts, you should look up the specific requirement for your individual make and model online.
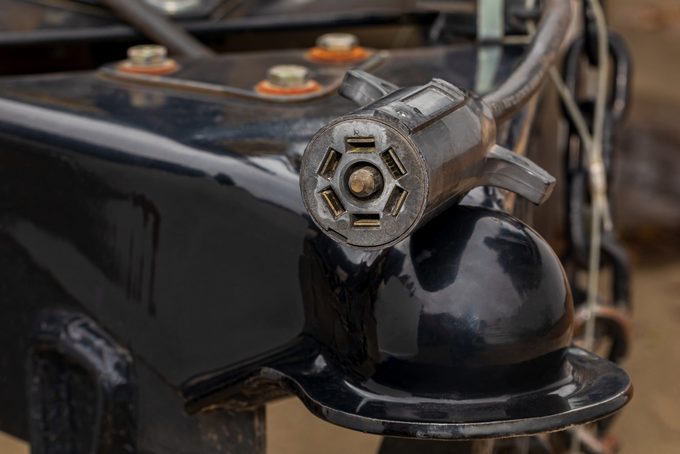
Add Trailer Wiring
This position was once challenging, yet nowadays it isn’t as tough. Pre-assembled trailer wiring kits can be found for numerous vehicle models. While some installations may vary in ease, none of them pose a significant challenge regardless.
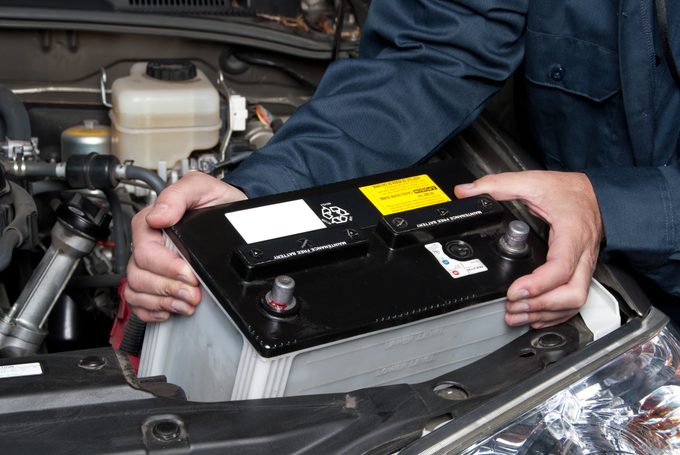
Battery Maintenance
A drained battery is inconvenient, yet you can manage it on your own. Additionally, you can be proactive by inspecting your battery periodically. Prioritize assessing your vehicle’s battery as part of your routine maintenance tasks so that you're aware when you should begin saving up for a replacement.
Test Your Battery
Every car battery ultimately reaches the end of its life, yet it can be difficult to determine just how near your battery is to failing completely when you attempt to start your vehicle. This uncertainty led to the creation of battery testers.
Battery testers assess the capability of a battery relative to its intended design output, along with important factors like startup voltage. High-quality battery testers come at an affordable price and offer valuable information that can assist in maintaining reliable operation of your vehicle.
Replace a Car Battery
If you've checked your battery and noticed it can no longer hold a charge, then it's probably time for a replacement. Just remember, with proper maintenance, most car batteries typically have a lifespan of around five years. Fortunately, you don't necessarily need to visit a mechanic for this task. Replacing your battery is an easy fix, and most stores where you can buy a new battery will recycle your old one free of charge.
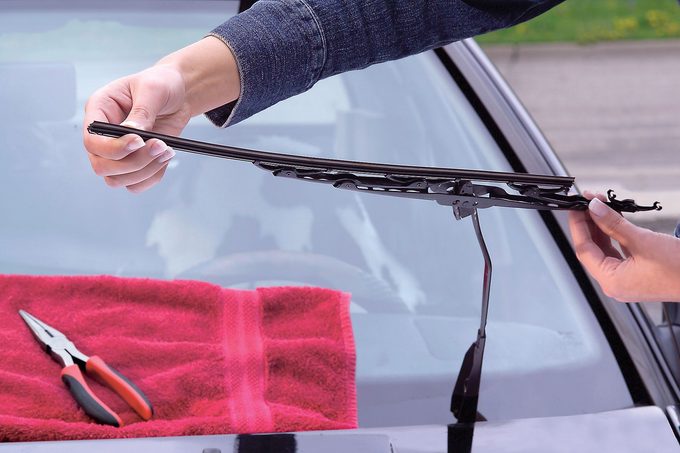
Replace Your Wiper Blades
It's simple to identify when your blades need replacing Just push the washer button and check if your blades clear dirt effectively. If they leave streaks, replace them. Buy a new pair and adhere to the setup guide provided. When removing the old blade, make certain you firmly hold the wiper arm; otherwise, it might strike the windscreen hard enough to create cracks.
Manage Filters
Several distinct filters can be found in your vehicle, and it’s advisable to replace them periodically as part of proper upkeep and servicing.
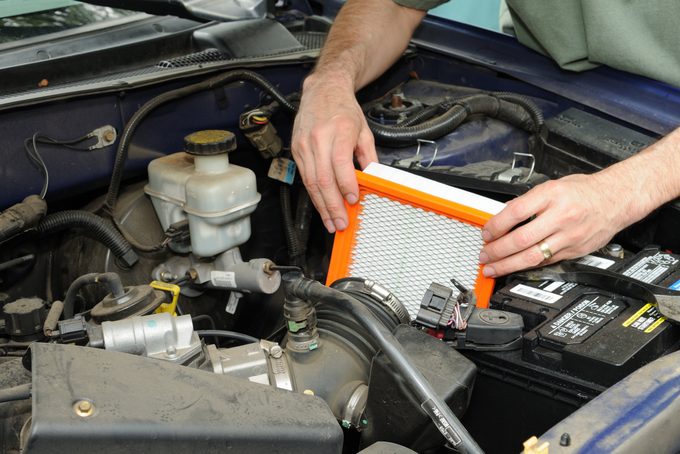
Replace Engine Air Filter
Examine and swap out your car's air filter. Simply undo the screws or clips securing the air filter box and take out the old filter. Hold a flashlight behind the filter to assess how much light shines through. Should the filter obstruct half or more of the light, install a new filter. Otherwise, reinstall the current filter, ensure the air filter box lid is secured, and continue using your vehicle. This ranks among the simpler tasks for maintaining automobiles.
Swap Out Your Cabin Air Filter
A clogged cabin air filter Damage to your car’s blower motor can occur, leading to extended and more strenuous operation of the AC during summertime. Luckily, replacing the cabin air filter is straightforward. Purchase a new cabin air filter from an auto parts store and request that the staff provide you with the setup guidelines.
Air cabin filters typically sit within the air ducts behind the glove compartment in newer cars. Yet, certain automotive manufacturers position these filters inside areas like the cowling or console section. Simply take off the cover panels and pull out the used filter. Make sure to observe the flow-direction indicators so as to correctly place the replacement filter when installing it anew. Finally, put back the cover plates and your task will be complete.
Replace That Broken Antenna
Replacing Installing a Fender-mount antenna mast is straightforward. Simply remove the leftover part of the mast and purchase a new one from an auto parts store. In contrast, changing a pillar-mounted antenna requires slightly more effort but remains something you can do yourself with some basic tools.
Detach the antenna wire from your radio and tie a thick thread to the end. Next, remove the antenna mounting screw from the pillar and extract both the old antenna and the thread together. Afterward, fasten the new antenna wire to the thread, draw the wire back inside the car, and reconnect it to your radio. Finally, fix the new antenna to the pillar with the included screws.
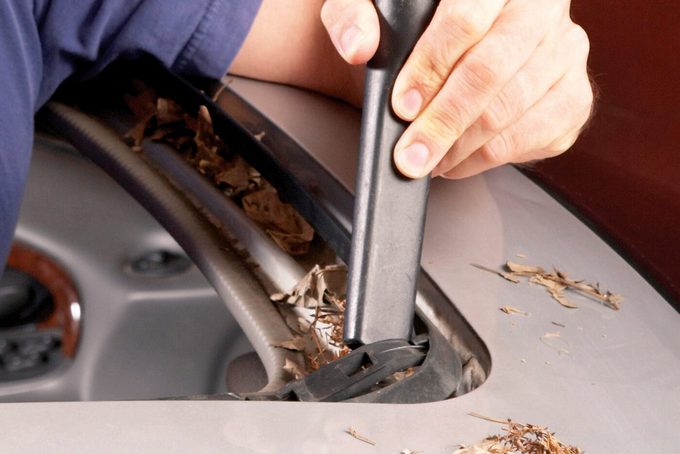
Fix That Leaky Sunroof
If raindrops continue to fall on your head, it’s likely because you are outside in the rain. sunroof The drains are blocked. Lift up the sunroof and search for the drainage holes located at both the front and back edges of the sunroof area. After identifying these outlets, attach one end of a short rubber or plastic hose securely with duct tape to the nozzle of your workshop vacuum cleaner. Use this setup to remove all obstructions from within the channels. Following this, pour some water down every channel individually and observe underneath the vehicle to ensure that the liquid flows properly onto either your driveway or garage flooring instead of pooling inside.
If the clog persists, purchase a speedometer cable from an automotive supply shop. Thread this cable into the drain and slowly advance it downward while rotating the cable using your fingertips. Be cautious not to apply excessive force since doing so might pierce the drainage pipes, causing water leakage into your dashboard compartment. After clearing the obstruction with the speedometer cable, rinse out the drain thoroughly. Should the channel now flow freely, you’ve resolved the issue and should expect no further ingress of moisture within your car.
Maintain the Neat Appearance of Your Seats
Your seats experience significant wear and tear, and this becomes very noticeable on lighter-colored ones quite rapidly. Luckily, you don't have to spend money getting them reupholstered. You can tackle car seat repairs and upkeep on your own.
Repair Rips in Leather and Vinyl
Auto upholstery stores tend to charge significantly for repairing seat tears. However, you can tackle this task yourself within a few hours using a vinyl and leather repair kit available at most auto parts stores. While you may need some practice to achieve the correct color blend and perfection isn’t guaranteed, it still beats having damaged-looking seats as you drive.
Begin by attaching reinforcement material underneath the damaged area of the vinyl or leather. Afterward, blend the heat-activated filler so that it matches the shade of your fabric before applying it over the damage. Locate a textured sheet that best mirrors the pattern of your vinyl or leather surface and set this atop the applied filler. Warm up the repair instrument using an iron then firmly press it against the top of the textured sheet. Lift the repair tool once done, yet keep the textured sheet undisturbed as everything sets. Finally, gently take away the textured sheet after cooling down occurs.
Clean and Maintain the Seat Upholstery
After a few years, you’ll notice that the color of the leather or vinyl seats no longer matches that of the rest of the interior. It’s not enough just to condition the leather. First spray on leather cleaner and rub vigorously with a clean terry cloth towel. To avoid rubbing the grime back into the seats, keep flipping the cloth to expose a fresh surface. Let the seats dry for an hour and then rub in a leather conditioner to keep the leather supple. It’s available at discount stores and auto stores.
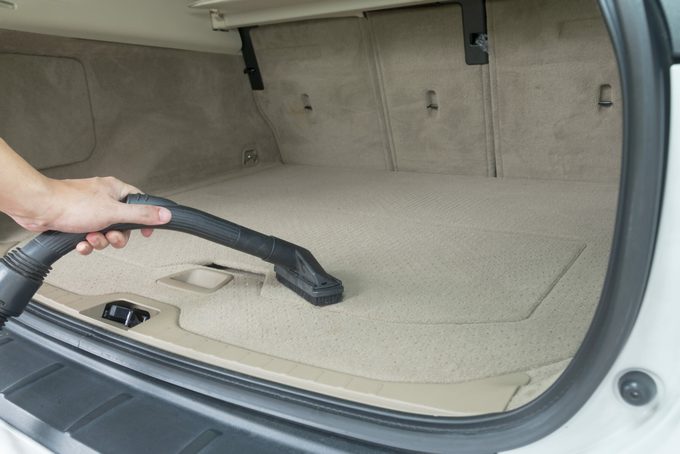
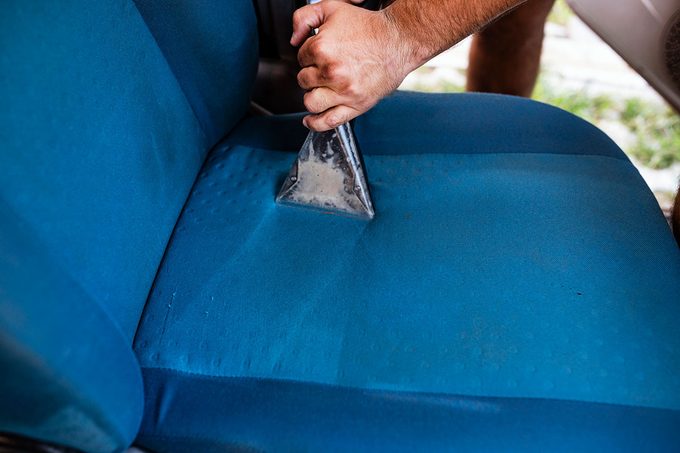
Clean the Carpet
Utilize a carpet cleaning machine to remove the soil that embeds deeply within the carpet fibers. This device injects a mixture of water and detergent onto the carpet before extracting the debris along with it into a collection tank. Such machinery often covers its cost after merely several cleanings. Alternatively, you could lease one from a local tool rental store or opt for an easier method involving a bottle-on cleanser paired with a scrubbing brush.
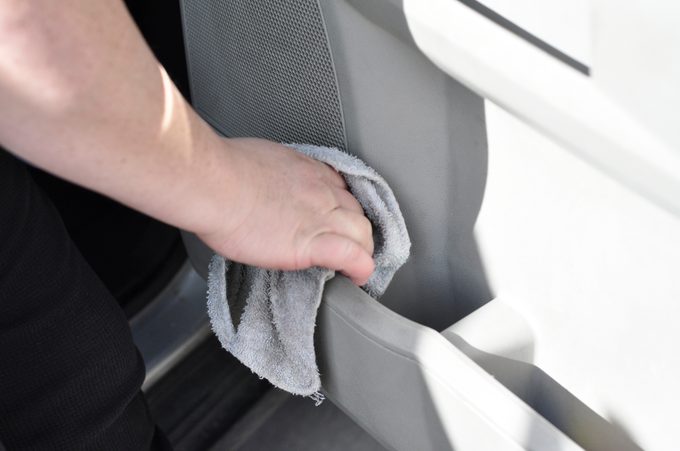
Remember the Recesses
Detailing involves thoroughly cleaning every crevice and edge. Cover a dull screwdriver with a cloth ensuring there are no sharp corners, then mist it with multipurpose cleaner. Gently glide this tool over the trim lines to remove grime, rotating to use different parts of the fabric as needed. Afterward, cleanse the areas surrounding buttons and controls before finishing off with a restorer product.
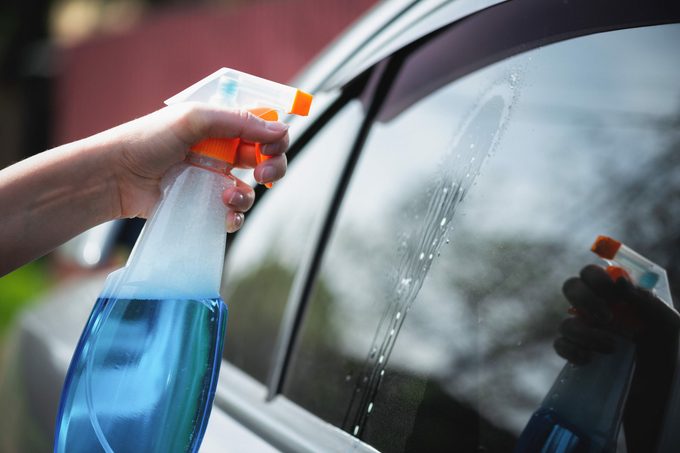
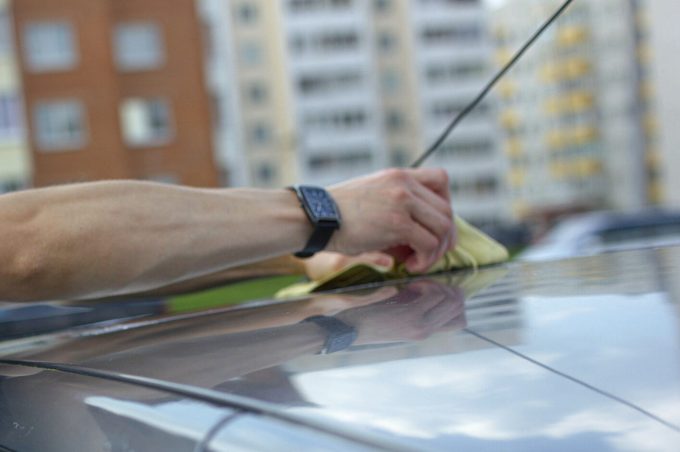
Wash the Windows
Make sure not to skip the upper edges. Have you ever seen that dirty streak along the top of car windows when they're partly lowered? This area often gets ignored during a rushed car washing session. All it requires is a bit of Windex and a fresh cloth for a thorough cleaning, which shouldn’t take more than a few minutes.
Maintain Doors and Fastenings for Effortless Operation
Occasionally, your locks and latches may begin to display signs of wear. However, once they start sticking or catching on objects, repairing them can be fairly straightforward. Among the repairs we've listed, this ranks as one of the quickest car fixes and upkeep tasks.
Include Graphite in Door Lock Maintenance
Ensure smooth operation of your lock mechanism using graphite powder. Typically, we only consider our door locks when something goes wrong, like a broken-off key inside the cylinder. To keep these intricate components functioning smoothly, apply some dry graphite powder. If necessary, gently move aside the dust protection flap with a tiny metal pick to access the lock. Squeeze the container briefly for an adequate amount of graphite. Use your key to operate the lock multiple times to distribute the powder within the mechanism. Don’t forget to do the same for your vehicle’s trunk lock too.
Release a Jammed Car HoodLatch
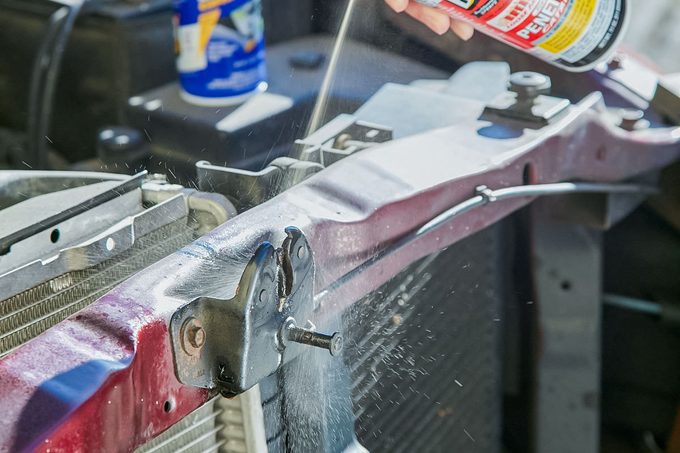
If your car hood isn't opening and closing smoothly due to rust, you can resolve this issue within approximately ten minutes using some basic tools: a spray rust penetrant and a spray-on lithium lubricant. Start by lifting the hood and thoroughly spraying the lock mechanism with the rust solvent. Move the hood up and down repeatedly until it operates freely. Since the penetrating oil might not provide lasting protection, follow up by applying white lithium grease onto every movable part of the hinge once the hood is open again. Repeat the process of raising and lowering the hood for a few more cycles to ensure everything runs smoothly from now on.
Headlight Repair and Servicing
Your headlights ought to be near the top of your list when it comes to car repairs and maintenance. They're crucial for safety, enabling you to view the road ahead and allowing others to spot you easily.
Fix Dim Headlights
Just clean the ground connection to bring back the brilliance of your dull headlights. If you notice a grayish/brown coating on the interior surface of the lens, use some dielectric grease or consider replacing the bulb altogether.
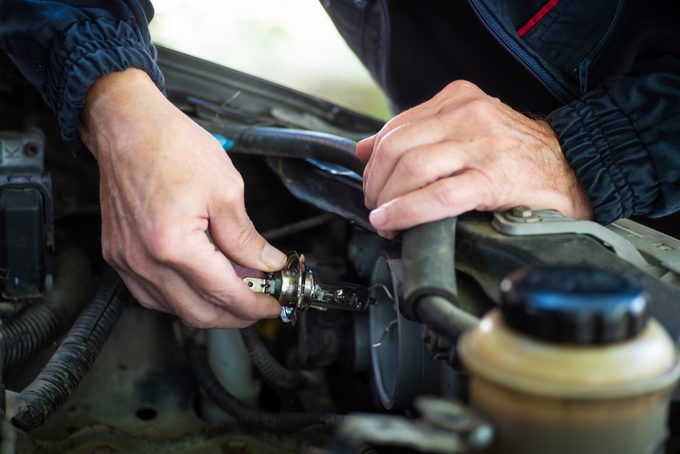
Replace Headlights
The toughest aspect of this task is selecting a new bulb. It’s possible to dedicate more hours searching for the right bulbs than actually installing them. This process can be overwhelming due to the vast array of options available. Each lighting company uses its own complex terminology for different types, which complicates comparison-shopping. However, everything essentially comes down to four main factors: brightness level, lifespan, color temperature, and power usage. Determine your priorities first; then use those criteria to filter through your choices accordingly.
Replace Non-Headlight Bulbs
To replace burnt-out license plate lights, side markers, and fog lamps, start by removing the securing screws and gently prying off the cover lens. Remove the old bulb by pulling it directly outward from the socket. When handling the replacement bulb, use gloves or wrap your hand in a paper towel to avoid transferring oil onto the fragile glass; this could lead to an early malfunction. Once properly positioned, insert the new bulb into the socket until it locks in place with a click sound. Finally, reinstall the lens, and you're all set.


Comments
Post a Comment